


Step 1: Download and Install phpMyAdmin
phpMyAdmin is included in Ubuntu 18.04 software repository, so we can easily install it with the following command.
sudo apt update
sudo apt install phpmyadmin
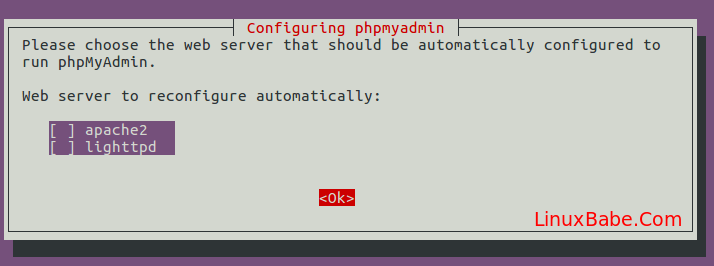
During the installation, it will prompt you to select a web server to configure. Nginx isn’t in the list, so press the Tab key and hit OK to skip this step.
Next, select Yes to create a new database and let
dbconfig-common to configure it.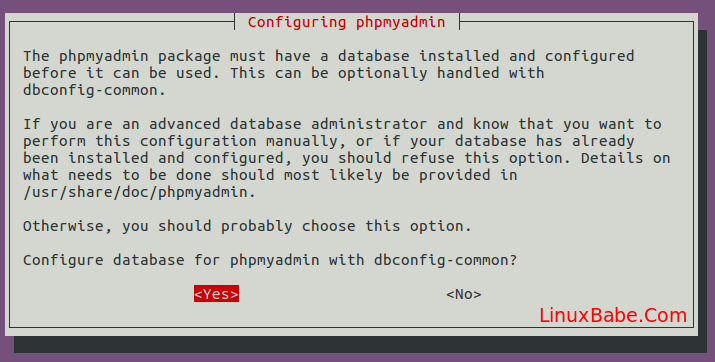
This will also create a new database user named
phpmyadmin. Give this user a password.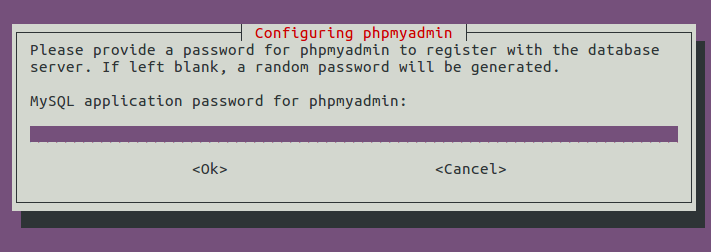
Once done, a new database named
phpmyadmin is created and the database user phpmyadmin has necessary privileges to manage this database. If you are curious as I am, you can log into MariaDB and check what privileges phpmyadmin user has been granted.
The installation will now finish. For the Nginx web server to find and serve the phpMyAdmin files correctly, we’ll need to create a symbolic link from the installation files to Nginx’s document root directory:
- sudo ln -s /usr/share/phpmyadmin /var/www/html/phpmyadmin
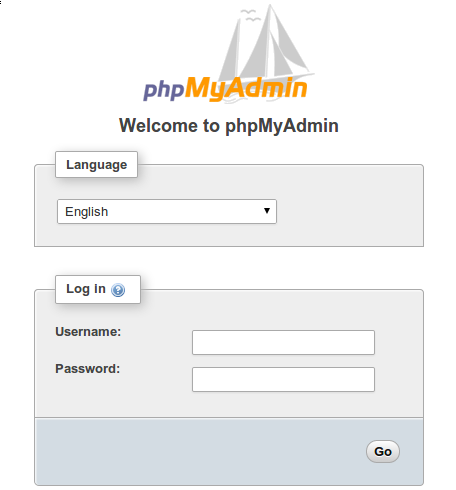
Your phpMyAdmin installation is now operational. To access the interface, go to your server’s domain name or public IP address followed by
/phpmyadmin in your web browser:https://server_domain_or_IP/phpmyadmin
Post a Comment